

As your AC unit intakes and circulates air from outside, it accumulates dirt, debris, allergens, and pollutants over time. Not only does it look nasty, but a dirty AC can also lead to inefficiency, faults, and unexpected breakdowns.
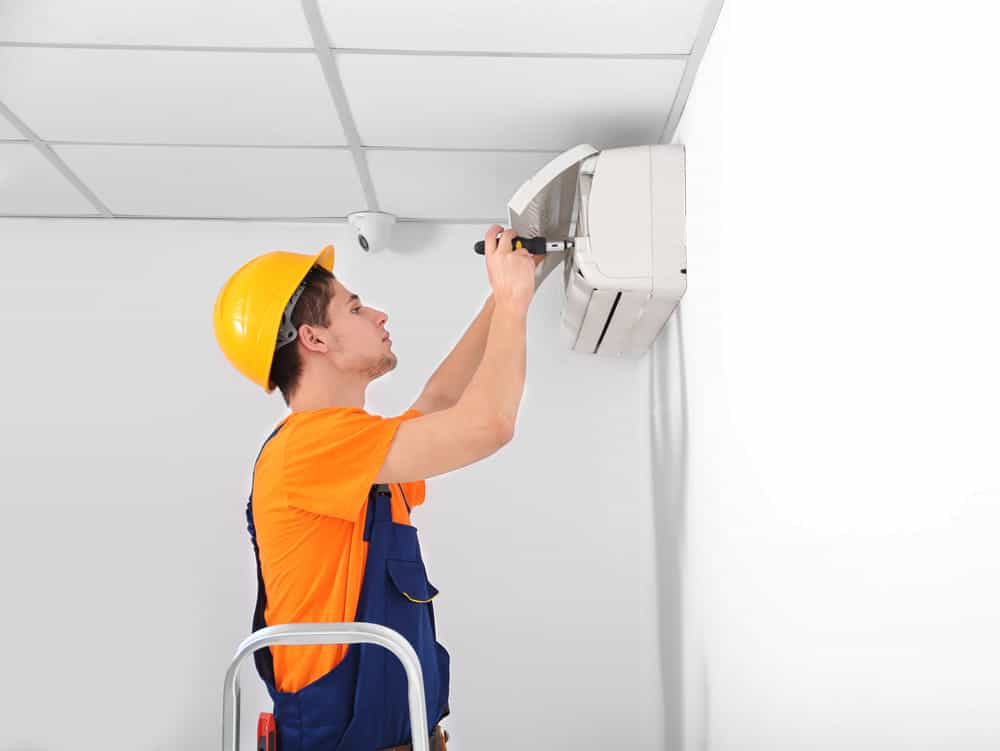
Cleaning an AC unit on your own is possible if you are a handy DIY person. But not everyone is a PRO who knows how to clean an air conditioner! If you prefer not to get your hands dirty, then call 214-310-COOL (2665) to work with an expert in McKinney, Frisco, Plano, and surrounding areas in Texas.
If you’re one of those looking for how to clean an air conditioner, we got you covered with this ultimate guide. Read on to uncover every step of AC cleaning and preparation!
Introduction: Cleaning an AC Unit
Regular maintenance and cleaning of your air conditioning (AC) unit is essential to ensure its optimal performance and longevity. With proper care, your AC unit can effectively cool your home or office, providing a comfortable environment even during scorching Texan summer months.
Neglecting AC maintenance can lead to reduced cooling efficiency, increased energy consumption, and potential breakdowns, resulting in costly repairs. Not to mention the build-up of allergens. Therefore, it is crucial to prioritize the cleanliness of your AC unit.
Cleaning an AC unit involves removing dirt, dust, debris, and other pollutants that accumulate over time. These contaminants can clog the air filters, obstruct the airflow, and hinder the cooling process. As a result, the AC unit has to work harder, leading to higher energy consumption and decreased cooling capacity.
Learning how to clean an air conditioner not only enhances the unit’s performance but also promotes better indoor air quality by reducing allergens and improving ventilation. Moreover, cleaning an AC unit allows you to identify and address potential issues before they escalate into major problems.

Understanding Your Air Conditioner
To grasp the inner workings of an air conditioner (AC), it’s important to delve into its fundamental principles. AC units employ a refrigeration cycle to cool the air in your space. The process starts with a compressor that pumps refrigerant gas into the system.
As the refrigerant enters the evaporator coil it absorbs heat from the indoor air causing the air to cool down. The refrigerant, now in a gaseous state, moves to the condenser coil outside where it releases the absorbed heat into the outdoor environment. This continuous cycle ensures a consistent supply of cool air indoors.
Let’s delve into the inner workings of an AC system and explore its key components.
Evaporator Coil
The evaporator coil is typically made of copper or aluminum and contains refrigerant. As warm air from your space passes over the coil, the refrigerant absorbs the heat from the air, causing it to evaporate. This process cools the air and reduces its humidity, creating a more comfortable environment.
Condenser Coil
The condenser coil is situated in the outdoor unit of the air conditioner. Its primary function is to release the heat absorbed by the refrigerant in the evaporator coil.
As the refrigerant flows through the condenser coil a fan blows air over the coil which expells the heat into the surrounding atmosphere. This process allows the refrigerant to cool down and return to its liquid state, ready to repeat the cooling cycle.
Air Filter
The air filter is a vital component that ensures the air circulated by your air conditioner is clean and free from dust, pollen, and other airborne particles. It traps these contaminants and prevents them from entering your living space.
Fan
In an indoor unit, the fan blows air over the evaporator coil helping to distribute the cooled air throughout your space. In an outdoor unit, the fan assists in expelling the heat absorbed by the refrigerant in the condenser coil. It ensures proper airflow and efficient heat transfer, enabling the AC system to operate optimally.
Common Issues Caused by Lack of Maintenance
Reduced Cooling Efficiency:
When the air filter becomes clogged with dirt and debris, it obstructs the airflow, reducing the AC’s cooling efficiency. This can result in longer cooling cycles, increased energy consumption, and higher utility bills.
Poor Air Quality:
A dirty air filter can allow dust, allergens, and pollutants to bypass the filter and enter your living space which compromises indoor air quality. This can lead to respiratory problems, allergies, and discomfort.
Refrigerant Leaks:
Insufficient maintenance can lead to refrigerant leaks which not only reduce cooling capacity but can also harm the environment. Low refrigerant levels put additional strain on the system, leading to increased energy consumption and potential compressor damage.
Component Failure:
Lack of maintenance can contribute to the wear and tear of various components in the AC system such as fan motors, belts, and electrical connections. This can result in frequent breakdowns and costly repairs.
Steps in Preparing for Cleaning
Before we start exploring how to clean an air conditioner, you’ll want to prepare yourself for cleaning an AC unit to make your job easier. We catered some quick tips to ensure your safety and effective cleaning!
Step 1: Safety Precautions
Prioritizing safety is paramount when preparing for any cleaning task involving electronics. Before you begin it is crucial to assess the area and identify potential risks. This allows you to take necessary precautions to protect yourself.
For instance, if you are doing a deep cleaning of a kitchen, you may encounter slippery surfaces, hot appliances, or harmful chemicals. Wearing non-slip shoes, and gloves, and making sure appliances are turned off can mitigate the risk of accidents.
Similarly, when cleaning your AC unit you want to ensure your environment is free of dust, and water that could enter your unit and assess any other potential hazard. We recommend you have a first aid kit nearby in case of minor injuries.
Step 2: Tools and Materials Needed
To ensure a smooth and efficient cleaning process, gather the required tools and materials beforehand. Having everything you need on hand prevents interruptions and saves time. Here are some tools and materials you may need:
Step 2.1: Safety Gloves and Goggles
Shielding yourself from potential hazards is crucial. Wear sturdy gloves to protect your hands from chemicals, sharp objects, or allergens. Safety goggles are also necessary to safeguard your eyes from debris, cleaning solutions, or dust particles.
Step 2.2: Screwdriver or Wrench
If you’re cleaning an AC unit using a process that involves disassembling or moving objects, keep a screwdriver or wrench handy. These tools will assist you in removing screws, bolts, or other fasteners.
Step 2.3: Brush or Vacuum Cleaner
Depending on the surface or item you are cleaning a brush or vacuum cleaner may be required. Brushes are effective for scrubbing away dirt or grime from hard surfaces while vacuum cleaners excel at removing dust, pet hair, or loose particles from your AC unit.
For instance, use a vacuum cleaner to clean dust effortlessly from the outer unit while a brush can help you clean the fins.
Step 2.4: Cleaning Solution
Select a suitable cleaning solution based on the type of dirt or stains you need to tackle. Different surfaces or materials may require specific cleaning agents, so carefully read the labels and follow the instructions for safe and effective use.
Step 2.5: Water Hose
Whether you’re cleaning the indoor or outdoor unit, a water hose can be an accurate choice. It’s not about throwing water on the main unit. However, you can use the sharp flow of water to clean dirt, mud, or debris in the air filters and ducts.
Step 3: Turning off the Air Conditioner
Even if you’ve cleaned your unit hundreds of times and know how to clean an air conditioner it is crucial to turn it off before proceeding. This precautionary measure prevents accidents such as electric shocks or damage to the unit. Refer to the manufacturer’s instructions for safely powering down the air conditioner and only proceed further once it is completely turned off.
The preparation of cleaning an AC unit may help you perform the task with some safety and effectiveness. But comprehensive AC maintenance and cleaning takes professional resources and experience.
At Classic Heating and Air, we understand the importance and concern for your safety. Schedule a Free Consultation and get the best out of your AC maintenance in McKinney, Plano and Frisco!
How to Clean the Evaporator Coil?
Importance of Cleaning the Evaporator Coil
The evaporator coil plays a vital role in the cooling process by absorbing heat from the indoor air. Over time dust, dirt, and other debris can accumulate on the coil, hindering its efficiency.
This buildup restricts airflow and reduces the coil’s ability to transfer heat, leading to decreased cooling performance, increased energy consumption, and even potential system breakdowns. That’s why cleaning the evaporator coil is an essential part of our guide on how to clean an air conditioner and maintain a comfortable indoor environment.
Step-by-Step Guide to Cleaning the Evaporator Coil
Step 1: Removing the Access Panel
Start with turning off the power supply to your HVAC system. Locate the access panel, which is typically situated near the evaporator coil. Carefully remove the screws or fasteners holding the panel in place and set the panel aside in a safe location.
Step 2: Inspecting the Coil for Dirt and Debris
Take a flashlight and visually inspect the evaporator coil for any visible dirt or debris. Pay close attention to the finned surface of the coil as this is where most buildup occurs. If you notice substantial dirt or debris proceed to the next step.
Step 3: Using a Brush to Clean the Coil
Using a soft-bristle brush gently scrub the finned surface of the coil to remove the accumulated dirt. Be cautious not to bend or damage the delicate fins. Work systematically from top to bottom, ensuring thorough cleaning of the entire coil surface.
Step 4: Rinsing the Coil with Water
Once you have brushed off the dirt use a spray bottle or a gentle stream of water to rinse the coil. Start from the top and allow the water to flow down, effectively washing away any remaining debris. Take care not to use excessive force that could bend the fins.
Cleaning the Condenser Coil
Importance of Cleaning the Condenser Coil
Even in normal usage, coils accumulate dirt and debris over time. This accumulation may hinder the release of heat and significantly affect the overall performance. Additionally, an air conditioner with an inefficient coil can lead to higher energy consumption and breakdowns.
Cleaning air conditioner coils is always a great idea to maintain optimal performance and energy efficiency. As a condenser coil is one of the significant components, you can sustain the lifespan of your air conditioner by following some quick steps.
Step-by-Step Guide to Cleaning the Condenser Coil
Step 1: Locating the Condenser Unit
Begin by locating the outdoor unit of your cooling system. It is usually situated near the house, typically on a concrete pad or mounted on brackets. Ensure that the power to the unit is turned off before proceeding.
Step 2: Removing Debris Around the Condenser
Clear any debris, such as leaves, grass, or branches, from around the condenser unit. Use a broom or a gloved hand to carefully remove the larger items, and a brush or a vacuum cleaner with a soft brush attachment to clean out smaller particles.
Step 3: Use a Brush or Vacuum Cleaner to Clean the Coil
Gently brush the condenser coil using a soft brush or use a vacuum cleaner with a brush attachment to remove any loose debris or dirt. Take care not to damage the delicate fins of the coil during this process.
Step 4: Rinsing the Coil with Water
Rinse the coil with water using a garden hose with a spray attachment. Start from the top and work your way down, ensuring that the water flows in the opposite direction of the air movement through the coil. This will effectively flush out any remaining dirt or debris.
Cleaning or Replacing Air Filters
Importance of a Clean Air Filter
An air filter acts as a barrier capturing dust, pollen, pet dander, and other airborne particles that can circulate in your home or office. A clean air filter enhances air circulation, prevents the accumulation of pollutants, and reduces the strain on your HVAC system. This is particularly important during the Texas allergy season.
It also promotes a healthier environment by reducing the presence of allergens and irritants which is especially beneficial for individuals with respiratory conditions or allergies. Before exploring how to clean an air conditioner filter, let’s take a look at the types of air filters.
Types of Air Filters
Fiberglass Filters
These inexpensive filters are made of layered fiberglass fibers and are designed to capture large particles such as dust and lint. However, they are not as effective at capturing smaller particles.
Pleated Filters
Pleated filters consist of a pleated paper or fabric material that provides a larger surface area for capturing particles. They offer better filtration than fiberglass filters and are available in various levels of filtration efficiency.
High-Efficiency Particulate Air (HEPA) Filters
HEPA filters are among the most efficient filters available. They can capture up to 99.97% of particles that are 0.3 microns or larger. HEPA filters are commonly used in environments where air quality is of utmost importance, such as hospitals or cleanrooms. If you are suffering from Texas allergens then you’ll want to use a HEPA filter.
Step-by-Step Guide to Air Filter Cleaning or Replacing
Step 1: Removing the Air Filter
Locate the air filter within your HVAC system. It is typically found near the air intake or in the air handler unit. Depending on your system, you may need to open a panel or remove a cover to access the filter.
Step 2: Inspecting the Filter for Dirt and Damage
Once you have removed the air filter, carefully inspect it for accumulated dirt and debris. Additionally, check for any signs of damage such as tears or holes which may hinder its filtration efficiency.
Step 3: Cleaning Reusable Filters
If you have a reusable filter, follow the manufacturer’s instructions for cleaning. In most cases, you can use a vacuum cleaner or gently wash the filter with mild soap and water. Ensure the filter is completely dry before reinstallation.
Step 4: Replacing Disposable Filters
For disposable filters, it’s recommended to replace them with a new one. Make sure to note the size and type of filter required for your system as indicated on the old filter or in your HVAC system’s manual. Even easier, call Classic 214-310-COOL (2665) and we’ll provide you with the ideal filter at a competitive price. Insert the new filter following the airflow direction arrows marked on the filter frame.
Cleaning the Fan
Importance of Cleaning the Fan
Cleaning the fan is an essential task that often gets overlooked but plays a crucial role in maintaining optimal performance and prolonging the lifespan of the fan. The dust, dirt, and debris accumulate on the fan blades and motor, impeding airflow and causing the fan to work harder.
This not only decreases its efficiency but also increases the risk of overheating and potential damage. By regularly cleaning the fan you can ensure proper ventilation, improve air quality, and prevent potential malfunctions.
Step-by-Step Guide to Cleaning the Fan
Step 1: Accessing the Fan
Before starting the cleaning process, ensure the fan is turned off and unplugged from the power source for safety. If the fan has a protective grille or cover, gently remove it by unscrewing or unclipping it.
Step 2: Removing Dirt and Debris from the Fan Blades
Using a soft brush or a vacuum cleaner with a brush attachment, gently remove loose dust and dirt from the fan blades. Start from the outer edges and work your way towards the center, ensuring all surfaces are thoroughly cleaned.
If there are stubborn dirt or sticky residues, dampen a cloth with mild soapy water and carefully wipe the blades. Avoid using excessive water as it can damage the motor or electrical components.
Step 3: Lubricating the Fan Motor if Necessary
Some fans may require lubrication to maintain smooth operation. Check the manufacturer’s instructions to determine if your fan needs lubrication and the recommended lubricant type. If lubrication is necessary, locate the oiling ports on the motor housing.
Apply a few drops of the appropriate lubricant into each port following the recommended amount. Avoid over-lubricating as it can lead to excess oil accumulation and attract more dust.
How to Resemble and Test Your AC Unit?
Step 1: Putting the components back together
After completing the necessary repairs or maintenance on your air conditioning unit it’s time to reassemble the various components. Begin by carefully placing the fan motor back into position and securing it with the appropriate screws or bolts. Make sure all electrical connections are properly reattached and tightened.
Next, reinstall the condenser coils and align them correctly. Take care to reconnect any refrigerant lines and ensure they are properly sealed. Reattach the access panels or covers ensuring they are securely fastened.
Step 2: Checking for proper installation
Once the reassembly is complete, take a moment to inspect the unit for any loose connections, leaks, or misaligned components. Verify that all electrical connections are secure and properly insulated. Double-check the refrigerant lines for any signs of leakage.
Ensure that the access panels or covers are in place and tightly sealed. It’s also essential to confirm that the unit is properly leveled to prevent any operational issues.
Step 3: Turning on the air conditioner
Before turning on the air conditioner it’s advisable to wait for a few minutes to allow any refrigerant to settle. Then locate the power switch or breaker for the AC unit and turn it on. Give the unit a moment to start up and you should hear the familiar hum of the fan and compressor engaging.
Step 4: Monitoring performance and air quality
Once the air conditioner is running, pay close attention to its performance and air quality. Observe if the airflow is consistent and strong. Check for any unusual noises, vibrations or odors as these may indicate underlying issues.
Additionally, assess the air quality by monitoring the temperature and humidity levels in the room. If you notice any problems or abnormalities, it’s best to consult a professional HVAC technician for further inspection and necessary adjustments.
You’re ready to clean your AC on your own and we believe you’re going to nail it! However, the process consists of multiple steps that may consume your time, efforts, and some funds too. How about hiring a professional that can do it all for you?
If you don’t want to mess with all the complications, Classic Heating and Air got you covered. Our professional team holding OEM-approved tools will ensure flawless, safe, and efficient maintenance, improving the lifespan of your HVAC.
Classic Heating and Air is just a call away!
Conclusion: Importance of Regularly Cleaning Your AC
Regular cleaning not only improves indoor air quality and promotes a healthier living environment but also enhances the efficiency and performance of the system, leading to energy savings. Additionally, it helps prevent the growth of mold and mildew, minimizing unpleasant odors and potential health issues.
While DIY cleaning an AC unit following our guide on how to clean an air conditioner is beneficial, hiring a professional air conditioner service can provide further advantages.
Most of our customers in McKinney, Plano and Frisco get a Classic preventative maintenance plan to save time and remedy any potential issues before they become costly. With the Texas heat and high allergen count in the air, having a properly functioning AC is essential.
Our professionals have the expertise and tools to thoroughly clean and maintain your unit, ensuring optimal performance and detecting any underlying issues early on. Their knowledge and experience can help extend the lifespan of the air conditioner, saving you money in the long run.